Hey dolls, some of you requested a pictorial of how I did my first ombre mani (view it
HERE) a few weeks ago...so here it is. Here are the materials needed:
- Opaque nail polish of your choice
- white polish
- base/top coat
- toothpicks
- aluminium foil or a paper plate
- acetone/polish remover.
I used
Zoya Sooki
as the original color and
Sally Hansen White On
as the add in.
First apply the base coat of your choice. I used
Sally Hansen Double Duty
. After the base coat is dry, polish your pinkies with the opaque color of your choosing.
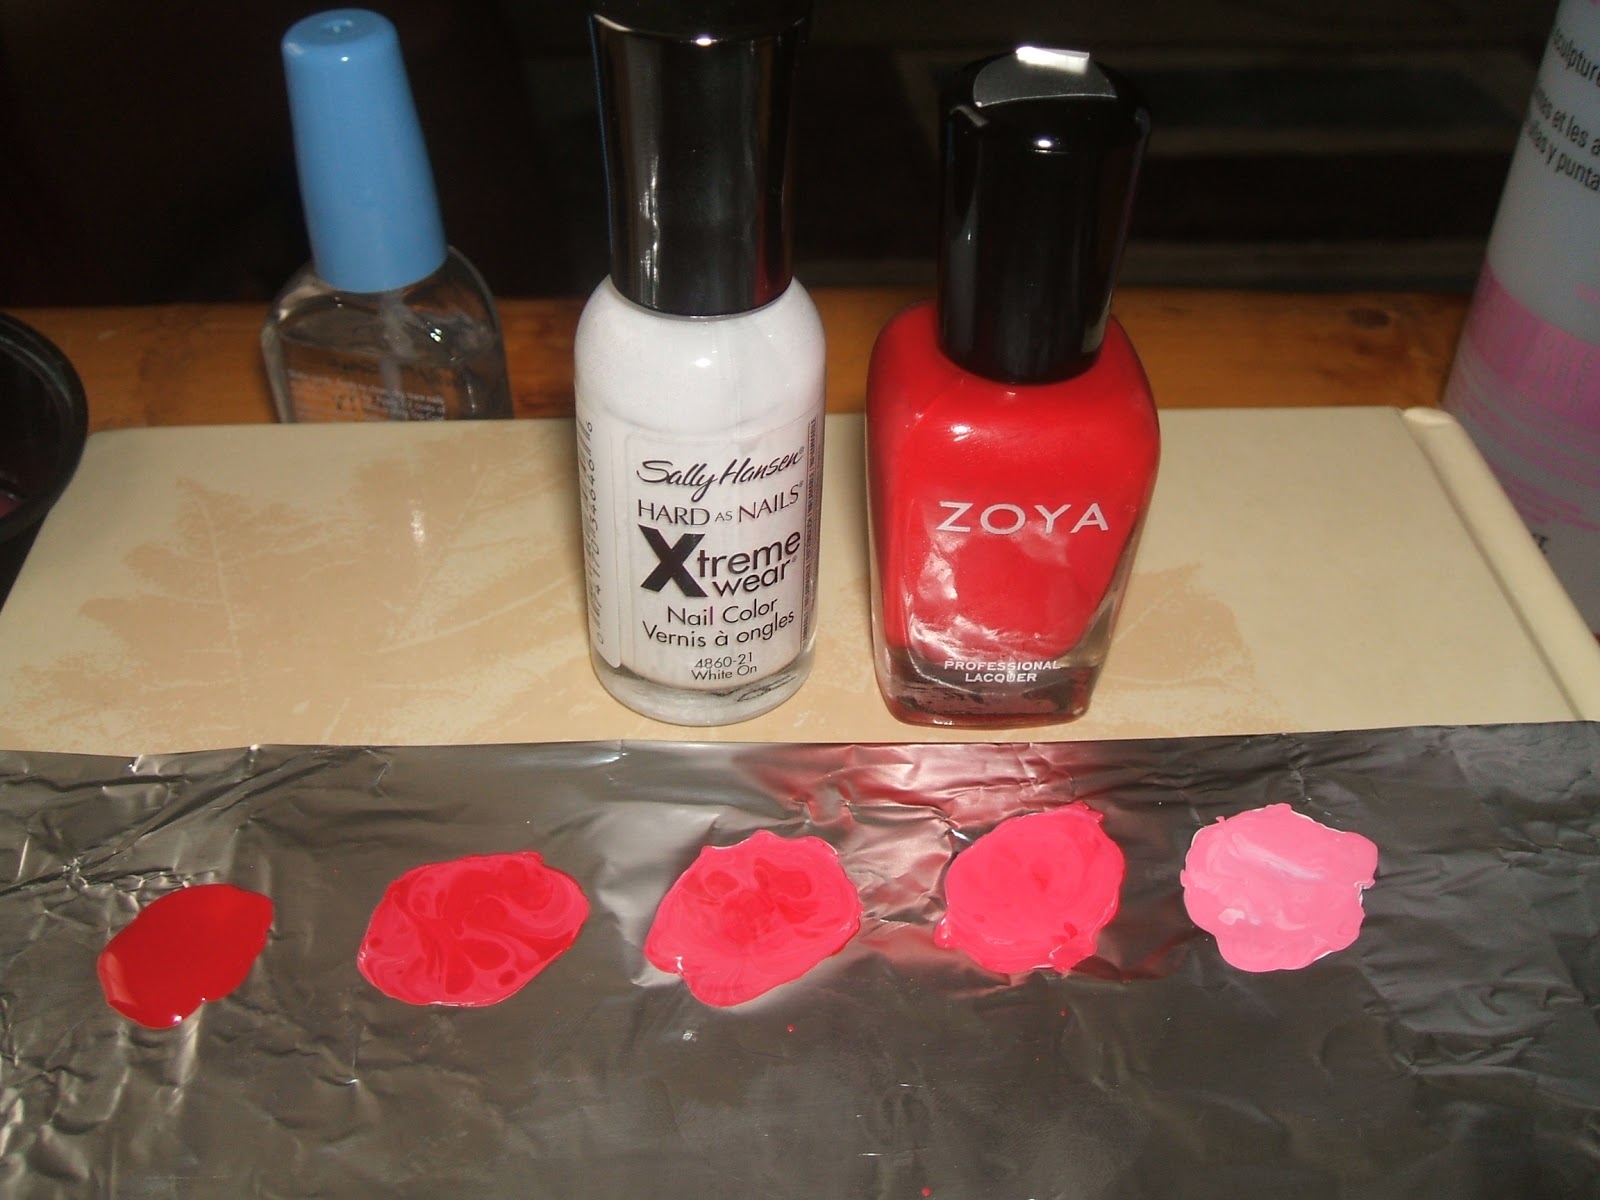
Place 3-4 drops of your opaque color onto the mixing surface.
Add one drop of white polish, then mix with a toothpick until the colors are blended.
Polish both ring fingers with this mixture. Its easier to do the fingers at the same time, so make sure you mix enough for both.
Clean off your brush using acetone/polish remover after each finger to avoid the colors mixing.
For the middle fingers, add 2 drops of white to the base color then stir with a toothpick.
Continue with the index fingers by adding 3-4 drops of white to the base color. Stir and then polish both index fingers.
For the thumbs, put down 3-4 drops of white polish first. Then add 1 drop of your base color and stir.
Here's what your completed ombre mani will look like. You just have to use your judgment when adding white to make sure the color progressively changes. When done, I added a top coat of
Seche Vite
.
 |
| Indoors with flash |
 |
| Sunlight, no flash |
I know, I know...that was a lot of pics. But at least all of you can do this now. Its super easy and only took me about 15-20 mins. Give it a try and let me know what you think. Happy polishing dolls!


12 comments:
Looks so smooth and really gradual. I may try this soon. What top coat do you use?
oh wait. you answered that. thannks
Great manicure! Thank you for the tutorial too.
Thanks ladies!
@West...you know you put me on to SV!
@Stephanie...glad you enjoyed!
How cool! Thanks for sharing.
Wow! I really like that and had no idea until now how to do it! Thanks so much for posting this.
Thanks Olivia and Jeanie! Its super easy to do, you should try it Jeanie.
very pretty! gonna try it! thanks for sharing!
Just found your blog off of westNDNbeauty's blog... Ah, yeah, I will be lurking. Just fell in love with nail polish minus a yellow nail incident. :-)
Thanks Margaret and TheCoil! Feel free to lurk as much as you want and get some new ideas for polish!
TOTALLY love it!!! I usually don't paint my fingernails cuz I haven't the patience to let them dry before I'm on to doing something with my hands, but I'm DEF gana try it on my toes!!! :)
much appreciation for the demo and information. Loving your manicure :)
Post a Comment
*Please wait for the Disqus comment box to load.* I love to hear your feedback! Please leave your comments below. They are greatly appreciated!